
Milk Girl Cake is a classic dessert that is incredibly quick and easy to make. All the ingredients for the cake are readily available and quite affordable, so anyone can make this dessert. The cake can be made with candied berries to give the dessert a fresh taste. Soft sponge layers are enveloped in a light cream and paired with fresh strawberries to offer a balance between sweetness and fruit freshness. This cake suits both celebrations and relaxed gatherings, bringing a refined touch without complexity.
This version of the cake uses strawberries, but you can use any berries or fruits that go well with buttercream. These could include blueberries, peaches, raspberries, cherries, or currants.
How to prepare the condensed milk batter for thin layers
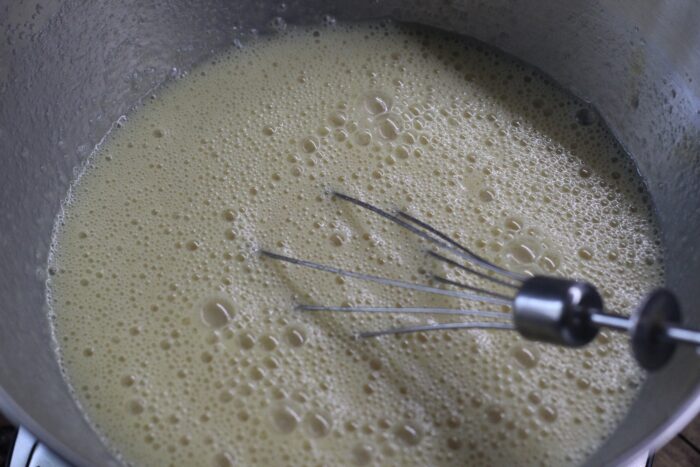
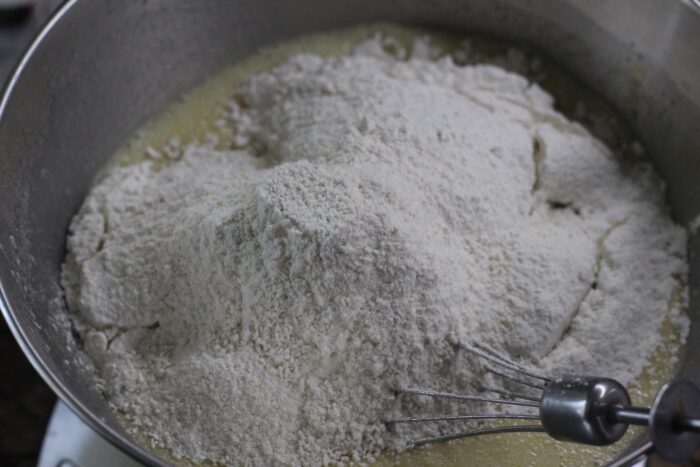
The batter for this cake is different from a classic sponge because it relies on condensed milk for sweetness and structure. Start by whipping room‑temperature eggs with salt and vanilla until they become pale and foamy; this step adds air and helps keep the layers soft after baking. When you add the condensed milk and cooled melted butter, mix on low to medium speed so the air in the eggs is not lost. The flour and baking powder should be sifted and folded in gently until just combined, because overmixing can make the layers dense. The final batter will be slightly runny and sticky, similar to pancake batter, which allows you to spread it into thin rounds. If the batter seems too thick, wait a few minutes; condensed milk often relaxes as it stands.
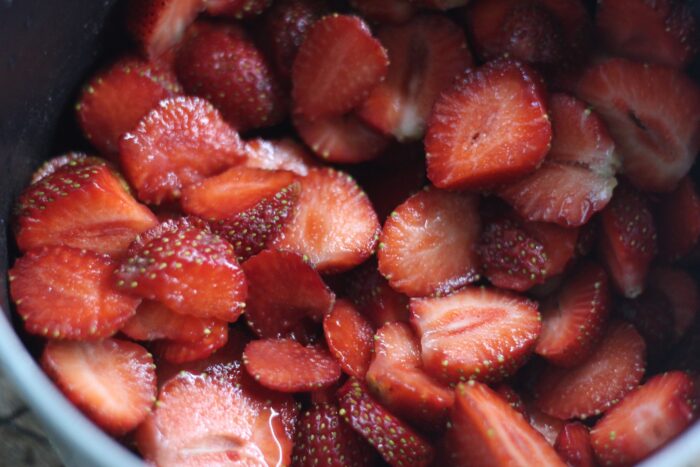
How to make a stable strawberry confit for filling
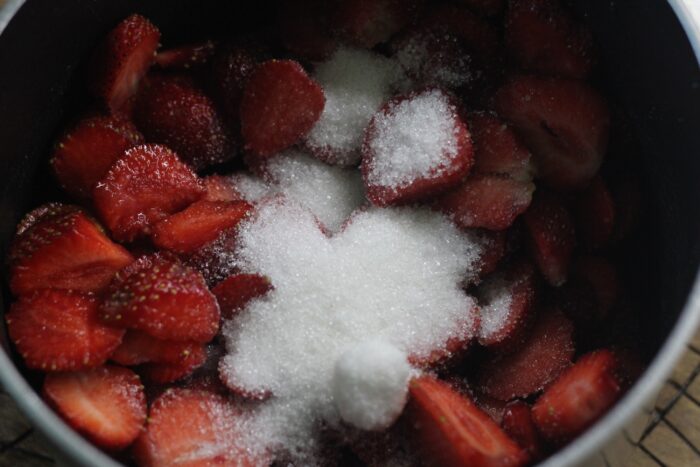
The strawberry filling for this cake is closer to a confit than a jam, which means it should be thick but still taste fresh. Cut the strawberries into small pieces so they cook quickly and release their juice. Mix sugar with cornstarch first, then sprinkle this mixture over the fruit in the saucepan; doing this prevents lumps and helps the starch distribute evenly. Cook over low heat, stirring all the time, until the sauce bubbles and visibly thickens. The confit will continue to set as it cools, so remove it from the heat when it coats the back of a spoon. If the mixture looks too thick later, you can loosen it with a spoon of water or lemon juice. Let the confit cool completely before layering it into the cake so it does not melt the cream.
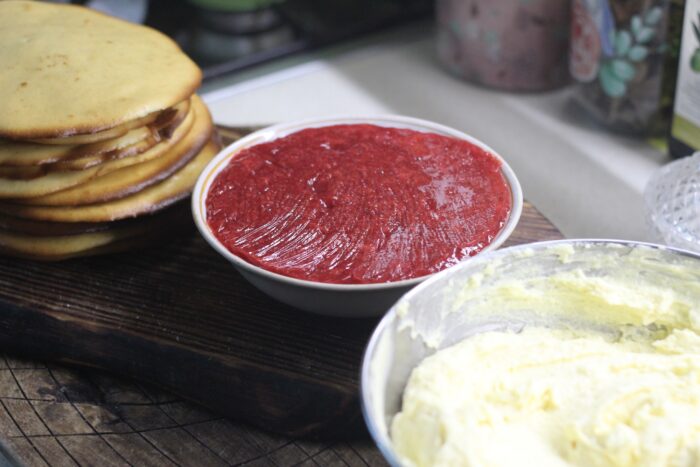
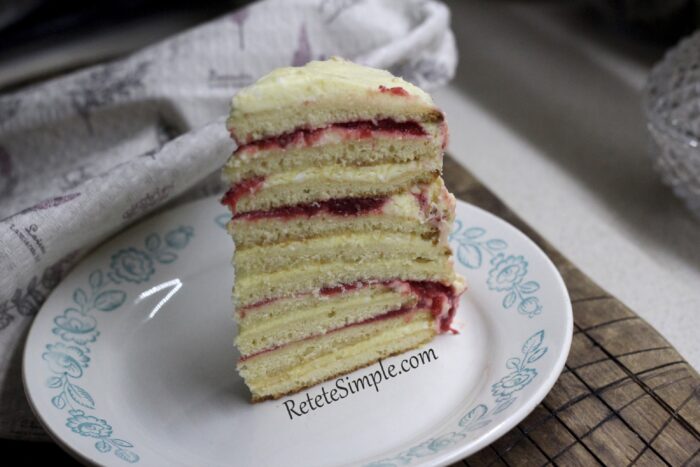
Assembling the cake with cream and strawberry layers
When all components are cold, you can start assembling the cake. Place the first baked layer on a serving plate and add a generous spoonful of cream, spreading it all the way to the edges. For more flavor and color, alternate between layers with just cream and layers where you add a thin stripe of strawberry confit in the middle. This way each slice will show a nice pattern of cream and fruit without becoming too wet. Continue until you use all layers, finishing with cream on top. At this stage the cake may look a bit uneven, but it will settle in the fridge as the layers absorb moisture. Wrap the cake lightly with plastic or place it in a tall container to protect it from drying out.
Common mistakes and how to avoid them
Several small mistakes can affect the final result of the cake, but they are easy to prevent. Overbaking the layers is one of the most common problems; they should not be browned all over, only lightly colored on the edges. Another issue appears when the cream is too runny, often because low fat dairy is used or the mixture is whipped for too long. If your strawberry confit is not cooked enough, it will be too liquid and may leak out between the layers. Also, assembling the cake while any component is still warm can cause the cream to slide and the structure to collapse. Taking time to cool and chill each element is the simplest way to get a neat, stable dessert.
Ingredients
- 1 can condensed milk
- 1½ cups flour
- 2 eggs
- a pinch of salt
- 2 cups fresh strawberries
- vanilla
- 1/2 cup butter
- 1 tsp baking powder
- sugar
- 1¼ cups cottage cheese
- 2½ cups whipping cream or sour cream
- 2 tsp cornstarch
- 1½ cups powdered sugar
Instructions
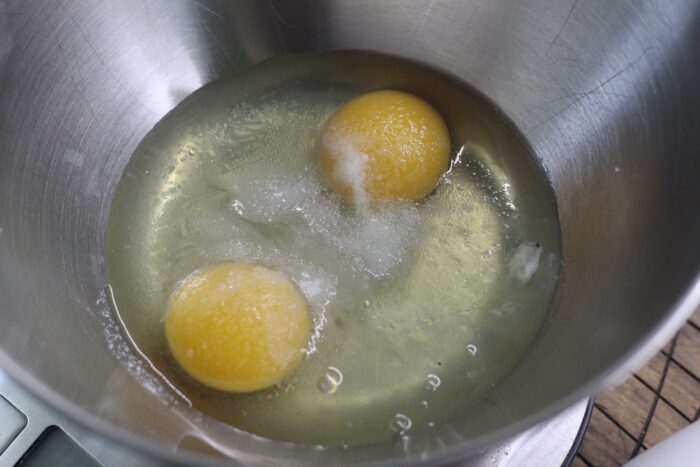
- First, beat the eggs with the salt and vanilla until light and fluffy using a mixer. The eggs should be warm.

- Add the condensed milk and cooled melted butter to the egg mixture. Beat the ingredients together again.
- Add the baking powder and flour. Mix the dough. The dough should be sticky and slightly runny, like pancake dough.
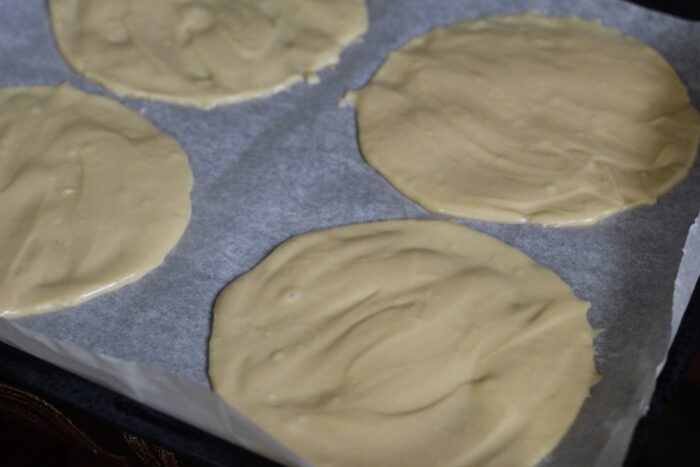
- Using a pastry ring or part of a mold, spread the dough on parchment paper with a spatula and spread evenly around the outline. You will get a total of 10 cookies with a diameter of 16 centimeters. Bake the cookies at 180°C (350°F) until they turn slightly golden.
- Clean and wash the strawberries, cut them up, and place them in a saucepan.
- Add the starch mixed with sugar to the strawberries. Simmer the berry confit over low heat until thickened.
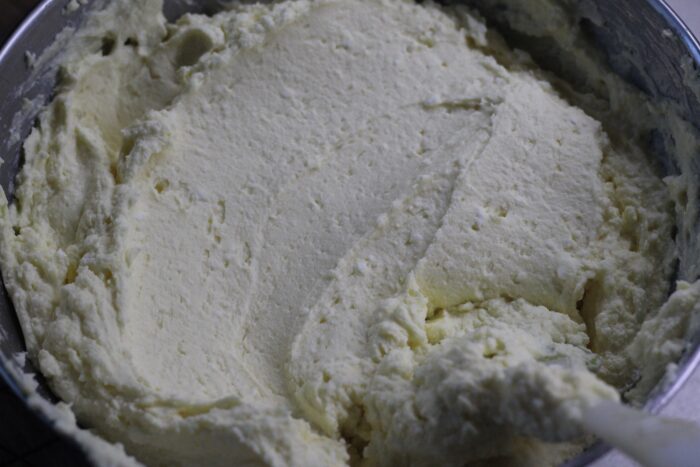
- Beat the full-fat cottage cheese with the powdered sugar for the cream. Add a pinch of salt and the sour cream. Whip the cream until light and fluffy. Put the candied strawberries and cream in the fridge and let the cakes cool completely.
- Assemble the cake by spreading the cream on the cakes. Add a layer of candied berries on top of the cake. Refrigerate the assembled cake overnight.
- The delicious strawberry milk cake is ready! Enjoy!
Notes
- For the best texture, bake the layers thin and do not overbake them; they should stay soft and only lightly golden on the edges.
- Make sure the butter is melted but fully cooled before mixing it into the eggs, so the batter stays smooth and the eggs do not curdle.
- Adjust the sugar in the strawberry confit to the sweetness of your fruit; very ripe strawberries will need less sugar than firm, slightly sour ones.
- Chill both the cream and the strawberry layer before assembling to keep the layers stable and prevent the filling from running out.
- Let the assembled cake rest in the fridge overnight so the cream can soak into the layers; this is the key step for a soft, sliceable cake that does not crumble.
Nutrition
Nutrition information is automatically calculated, so should only be used as an approximation.
FAQ
The layers are ready when the surface is dry to the touch and the edges are lightly golden; they should still feel soft and flexible, not crisp.
The cream can turn runny if the sour cream or whipping cream has a low fat percentage, or if you whip for too long; use at least 30 percent fat and stop as soon as soft peaks form.
Store the cake covered in the fridge for up to 2–3 days; because of the fresh fruit and dairy cream, it is not suitable for room‑temperature storage.